Preface
In today’s rapidly expanding smart home era, electric smart curtain rods have become essential for enhancing living comfort. With a mobile app, you can control opening and closing with one tap, set schedules, and even link them with lighting or air conditioning to create a cozy, energy-saving environment. However, during initial installation and calibration, users often run into confusion over complex components, network setup, or travel limit calibration, which can delay enjoying the convenience of smart control.
This comprehensive guide covers the three core areas—“Installation Precautions,” “Tuning Techniques,” and “Common Troubleshooting”—walking you step-by-step through each critical operation and handy tip. You’ll be able to install quickly, avoid common pitfalls, and seamlessly integrate your smart curtain rod into daily life!
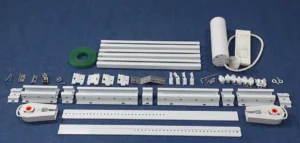
1. Pre-Installation Must-Reads | Safety Precautions for Electric Curtain Rod Installation
Before installing your electric curtain rod, be sure to follow these safety rules:
- Power Off First: Cut off the main power supply before wiring to prevent sparking and component damage.
- Prevent Physical Impact: Keep the PCB board and other components at least 5 mm away from the housing; add an insulating layer if needed.
- Guard Against Static: Take anti-static precautions to protect electronic parts when handling the controller.
- Secure Cable Connections: Ensure cables and connectors are not under longitudinal tension to avoid loosening.
- Waterproof Protection: Do not install the controller outdoors or in unprotected, moisture-exposed environments.
2. Step-by-Step Calibration of Your Electric Smart Curtain Rod
2.1 Pairing (Learn Code) with Remote Control
- Power on and press-and-hold the motor’s setup button for 3 seconds until the blue LED lights; release to enter pairing mode.
- Press the remote’s STOP button for 2 seconds; when the blue LED flashes 6 times, pairing is successful.
- Each motor can store up to 20 remotes; adding the 21st will overwrite the first.
Tip: If no action occurs within 10 seconds in pairing mode, it exits automatically.
2.2 Direction Reversal
- Enter pairing mode as above.
- Press the remote’s UP button; the LED flashes 6 times to confirm direction reversal.
- Note: All limit points are cleared after reversal and must be reset.
2.3 Wired-Control Mode Switching
- Enter pairing mode.
- Press the motor’s setup button to cycle through modes:
- 1 flash: 3-button mode
- 2 flashes: Interlock mode (any-stop)
- 3 flashes: 2-button rebound (release-to-stop)
- 4 flashes: Single-button cycle (up/down loop)
2.4 Custom Travel Limits (Set Precise Open/Close Positions)
Set Open Limit
- Move curtain to desired open position and stop.
- Press remote’s rear U2 button; blue LED blinks slowly (Mode 1).
- Press UP; LED turns off.
- Press U2 again; LED flashes 6 times—open limit set.
Set Close Limit
Follow the same steps, substituting the DOWN button for UP.
Note: You must first set end-of-travel limits (“hit stops”) before custom limits are allowed. After power-off and re-power, the motor re-homes to end stops and restores your custom limits. Percentage position is then calculated relative to these custom limits.
2.5 Clearing Custom Travel
- With motor stopped, press U2 (Mode 1) → STOP → U2 again.
- LED flashes 6 times—custom limits cleared.
Note: End-stop limits remain unaffected.
2.6 Middle-Stop Limit
- After setting upper and lower limits, you can add a middle-stop.
- Move to desired middle position and stop.
- Press U2 twice (first to Mode 1, then Mode 2), then press STOP—LED flashes 6 times to set or delete.
- To run to the middle stop, long-press STOP for 2 seconds; toggles middle-stop on/off.
2.7 Manual Pull-Start Function
- Press U2 twice (enter Mode 2), then press UP to toggle manual pull start on/off.
Note: Factory default is enabled. LED indicates status: one flash for off, steady 1 sec on for on.
2.8 Motor Speed Selection
- With motor stopped, short-press STOP three times (1 second between presses).
- LED flash count indicates speed:
- 1 flash: Level 1 (80 rpm, slowest)
- 2 flashes: Level 2 (100 rpm, medium)
- 3 flashes: Level 3 (120 rpm, fastest)
2.9 Factory Reset
- Power on and press-and-hold the setup button for 8 seconds.
- After 3 seconds, LED stays on; at 8 seconds, it flashes 6 times—reset complete.
3. Common Troubleshooting Table
| Symptom | Possible Cause | Solution |
|---|---|---|
| Motor unresponsive | No power or loose wiring | Check power supply and connections |
| Remote not working | Not paired or exceeded remotes | Re-pair or clear excess remotes |
| Travel limit errors | Incorrect or lost limit settings | Re-set custom travel limits |
| Manual pull fails | Pull-start function disabled | Enable manual pull in Mode 2 |
Conclusion
Installing and calibrating an electric smart curtain rod is straightforward when you follow proper procedures and tips. Use this guide to avoid pitfalls, quickly troubleshoot issues, and fully enjoy the convenience and comfort of your smart home setup!